
- Build in the crate
- 3.0.7 [MAS]
- Made by the team at
- CrowdCafé
- Menu languages offered
- Russian, English, German, Spanish, Italian, Chinese (Traditional), Chinese (Simplified), Korean, Dutch, Polish, French, Czech, Swedish, Japanese
- How you pay for it
- K'ed by TNT team
- macOS it plays on
- macOS 13 or later
- CPU it runs on
- Apple Silicon, Intel 64-bit
Screenshots
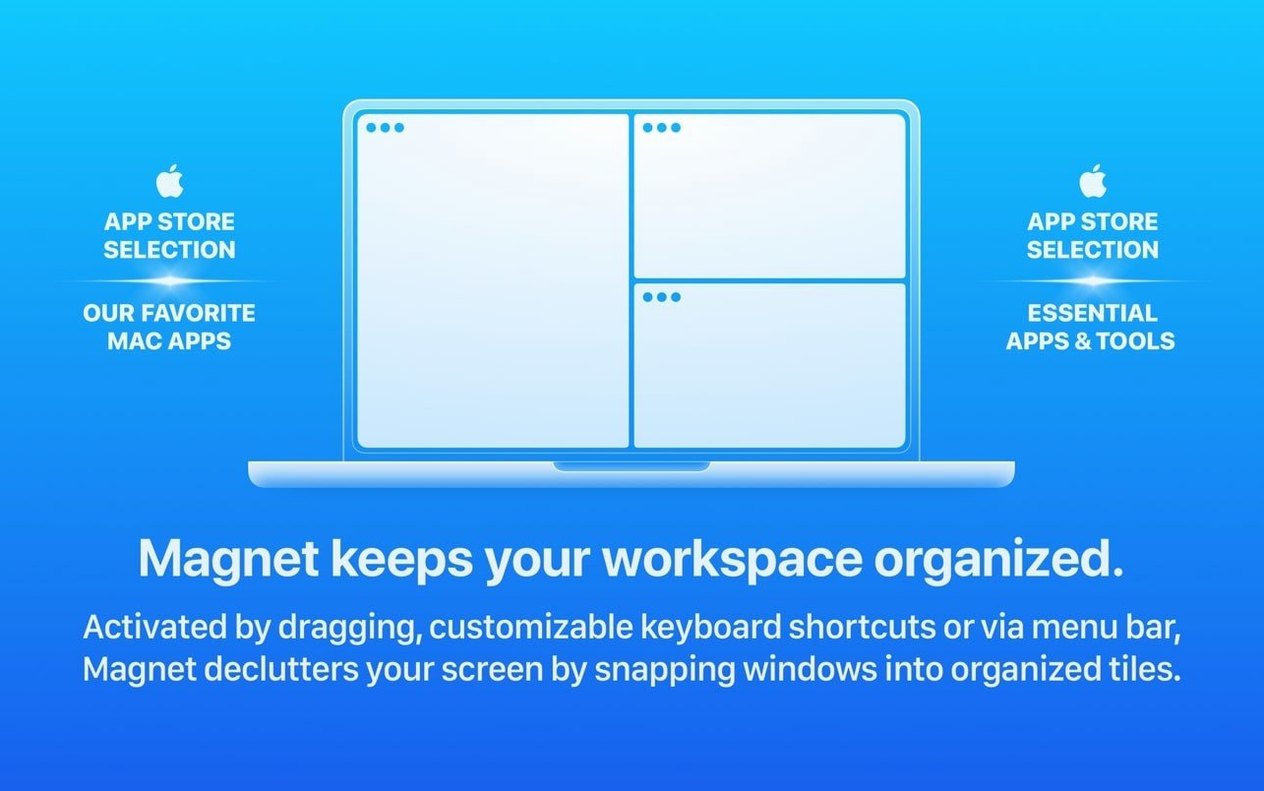
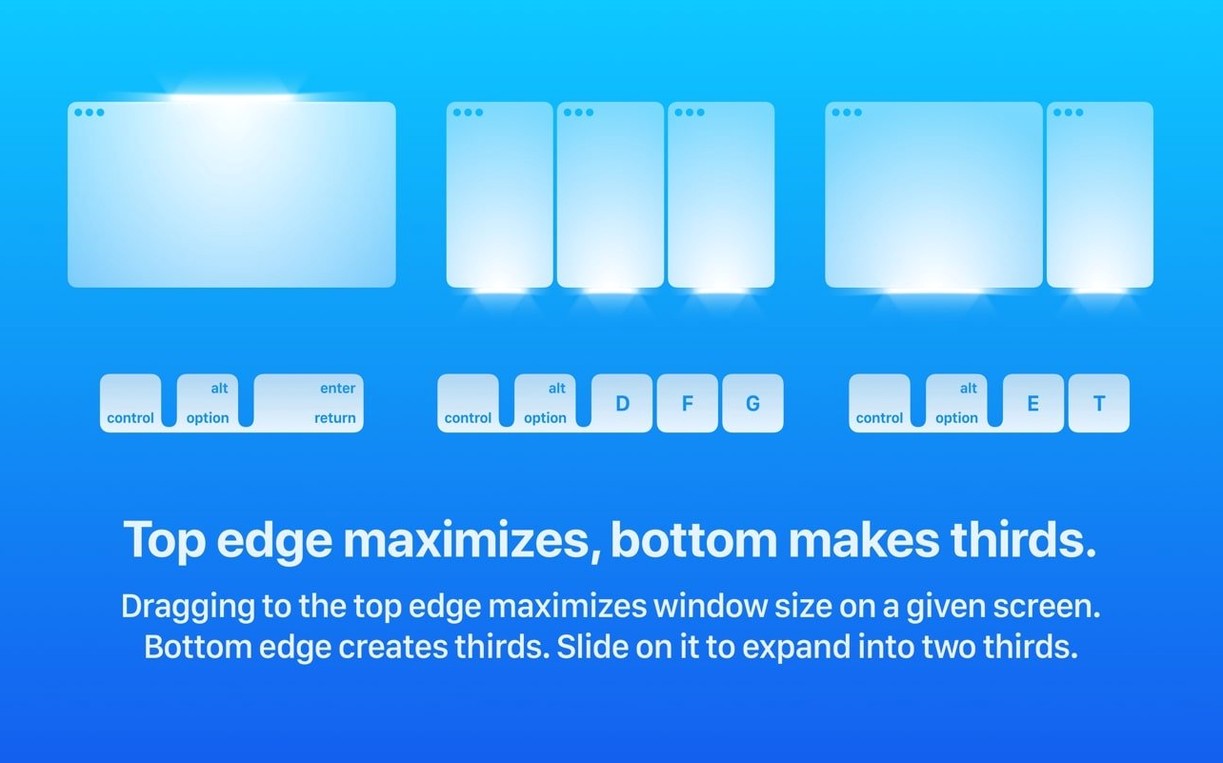
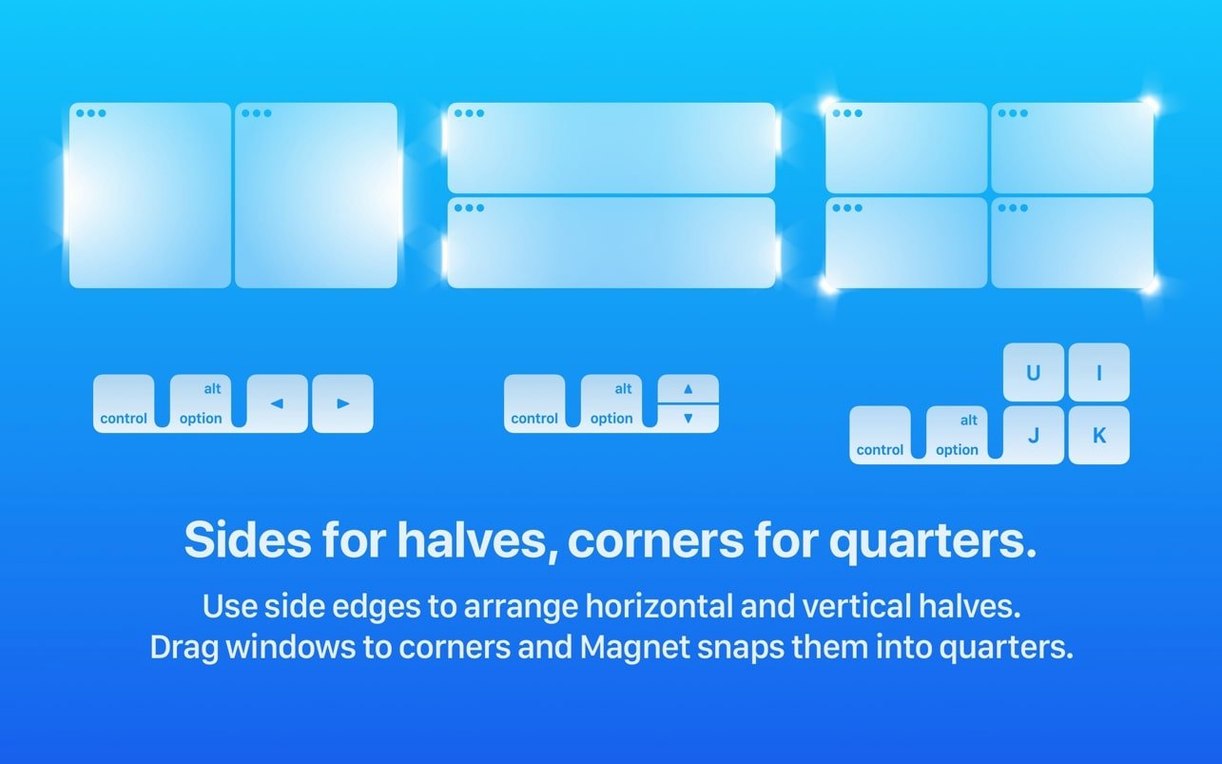
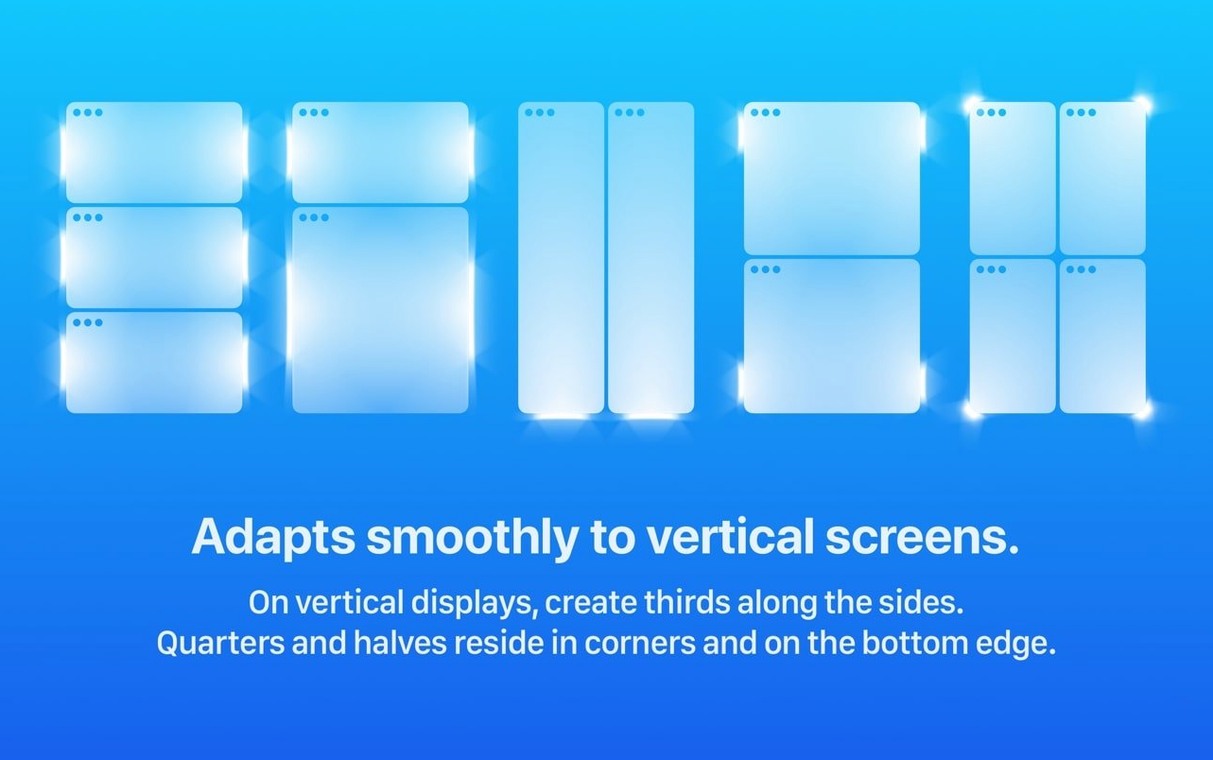
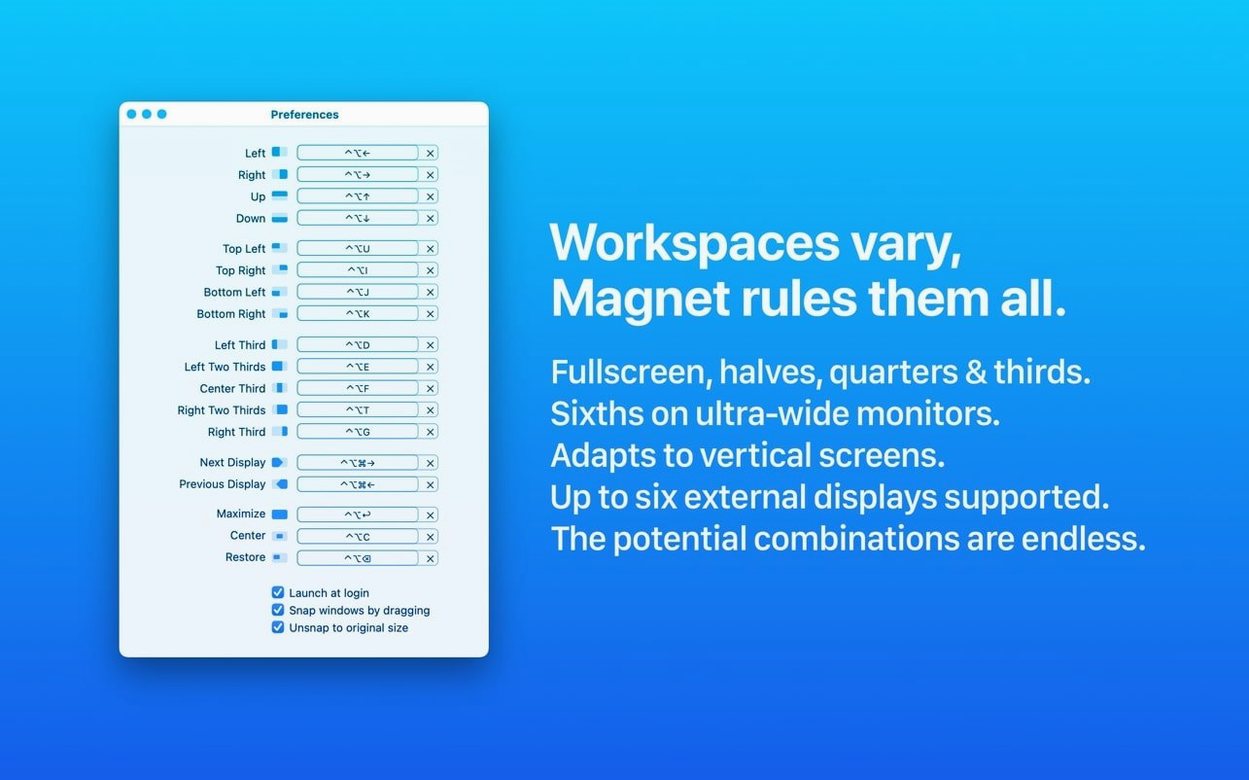
For anyone who juggles several apps at once – editors, designers, or just someone with too many browser tabs – Magnet turns window shuffling into a quick keystroke or a drag to the screen edge. It is a Mac window manager that extends what macOS already does, so it sits naturally alongside your other utilities.
Fits into your existing setup
Magnet works on Retina and non-Retina displays, and supports up to six external monitors. That means the same shortcuts work whether you are on a laptop screen or a multi-display desk. Full-screen, half-screen, quarter-screen, and custom layouts are all there, which covers most everyday arrangements without getting in the way.
Simple to run, easy to ignore
The app runs on both ARM and x86 Macs, and it needs macOS 13 or later. Once installed, it sits quietly in the menu bar. You do not have to think about it until you need to snap a window into place.
Because Magnet is so minimal when you first launch it, a few adjustments in its menu bar preferences make a real difference to how it behaves day to day. The app lets you configure custom hotkeys, and this is where you get the most value. Open the Magnet menu from the top bar and select Preferences.
Swap quarter-screen shortcuts to avoid app clashes
The default keyboard shortcuts are sensible, but you will probably want to swap a few to match your muscle memory. I changed the quarter-screen binds straight away – they default to combinations that can clash with other apps. You can assign your own keys for each layout, and it is worth doing that before you start using Magnet in earnest.
Another thing to check is whether you want Magnet to ignore certain apps. Some full-screen games or media players do not play well with window snapping, so you can add them to an exclusion list. The menu bar icon also has a toggle to pause Magnet entirely, which is handy if you need to rearrange windows manually without it interfering.
If you work with multiple displays, take a moment to set up which edges trigger snapping on which screen. Magnet lets you drag a window to the edge of any monitor, and the behaviour is consistent across all of them once you have set your preferences.
Side-by-side PDF and editor for report writing
Say you are writing a report and need to reference a PDF while typing in a text editor. With Magnet, you can set this up in a few seconds. Drag the PDF to the left edge of the screen until you see the blue outline, then release. It snaps to the left half. Do the same with your text editor on the right half. You now have two windows side by side, each taking exactly half the screen.
If you need a third window – maybe a browser for research – you can shrink one of the halves. Drag the text editor to the top-left corner to make it a quarter of the screen, then drag the browser to the bottom-left corner for another quarter. The PDF stays on the right half. Now you have three windows visible at once, no overlapping, no manual resizing.
Keyboard shortcuts are faster once you know them. I use Control+Option+Left Arrow for left half, Control+Option+Right Arrow for right half, and Control+Option+Up Arrow for full screen. For quarter positions, it is the same modifiers plus the arrow keys that point to each corner. After a day or two, your fingers remember them automatically.
Runs invisibly on macOS 13 and Apple Silicon
Magnet is a lightweight utility, so it does not demand much from your system. The requirements say macOS 13 or later, and it runs on both Apple Silicon and Intel Macs. You will not notice it in the background – it does not add a menu bar icon that uses resources, and it does not scan your windows constantly. It only activates when you drag a window to an edge or press a hotkey.
The app itself is a few megabytes on disk. It does not need an internet connection, it does not call home, and it does not install background processes that linger after you quit. When you close Magnet, your windows stay exactly where they are. The whole thing is about convenience, not overhead.
Lighter than BetterTouchTool's all-in-one toolbox
If you have looked at window managers for Mac before, you have probably seen BetterTouchTool, Rectangle, and Moom. BetterTouchTool is a giant toolbox that does window management as one of many features – it can also remap keys, create trackpad gestures, and control the Touch Bar. If you already use it for other things, you might not need Magnet. But if you only want window snapping, Magnet is simpler and more focused.
Rectangle is free and open source, and it does almost exactly what Magnet does. The difference is mostly in polish and keyboard shortcut defaults. Rectangle has more options for custom layouts and can be configured to snap windows automatically. Magnet feels slightly more refined out of the box, especially if you prefer dragging windows to screen edges rather than relying entirely on keyboard shortcuts.
Moom is another paid option that emphasises custom grid layouts and saved window positions. It is better if you need to restore a specific set of windows for different projects. Magnet is faster for quick, everyday snapping because it uses edge dragging and a smaller set of keyboard shortcuts. For most people, Magnet hits the right balance between power and simplicity.
- macOS 13 Ventura or later
- Architecture: ARM and x86 (64-bit)
Kit check at a glance
| System | macOS 13 or later |
| Chip | Apple Silicon, Intel 64-bit |
| Download | 6 MB |
| Older pressings | 1 in the crate |




Chat from the booth
Sign in or grab a free account to leave a comment.
Nobody has said a word in the booth yet. If you played a set with this build, tell the next person how it went.