

- Build in the crate
- 2.1.6
- Made by the team at
- Digitalanarchy
- Menu languages offered
- English
- How you pay for it
- K'ed by Monter Group
- CPU it runs on
- Apple Silicon, Intel 64-bit
Screenshots
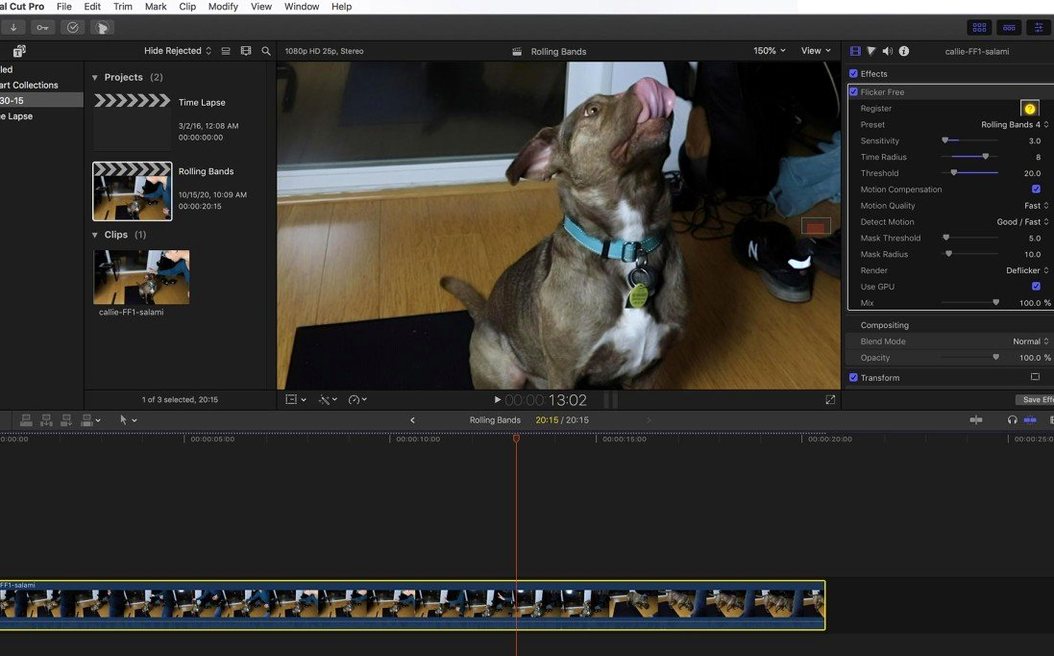
Digital Anarchy Flicker Free is a video deflicker plugin that handles the kind of flicker most tools give up on — time-lapse sequences, slow-motion clips and computer monitors recorded on camera. Version 2.1.6 keeps the workflow practical: you apply it, render a short test segment, and only then process the full project. That saves waiting around when you’re dialling in settings.
The plugin runs inside Final Cut Pro, Premiere Pro, After Effects, Avid, DaVinci Resolve and any OpenFX host. It’s built for both ARM and Intel Macs, 64-bit only. Presets get you started quickly, but the real value is in the manual controls — you can tweak the detection threshold and temporal smoothing to match the specific pattern in your footage. Monitor flicker is a common pain point, and this plugin handles it with noticeably less blur than simpler deflicker filters.
Installation is straightforward: the package includes its own instructions and activation steps. Everything is in English, and the interface is clean enough that you’ll spend time adjusting parameters, not hunting for menus. If you’ve ever spent hours trying to fix pulsing lights or rolling shutter artefacts by hand, this plugin does the work in a fraction of the time.
Fix flicker still visible after rendering
No plugin works perfectly straight out of the box every time. Here are the hiccups people run into with Flicker Free and what usually fixes them.
- Flicker still visible after rendering. The most likely cause is the detection threshold set too low. Increase it gradually until the plugin starts catching the pattern. If the flicker is irregular, try a wider temporal smoothing window — that tells the plugin to look at more frames for a consistent average.
- Motion blur or ghosting. When temporal smoothing is set too high, moving objects can smear. Dial it back until the motion stays crisp while the flicker remains gone. For fast-moving subjects, keep smoothing low and rely more on the threshold control.
- Plugin doesn't show up in your host. Make sure the installer placed the plugin file in the correct folder for your application. After Effects and Premiere Pro look in different places than DaVinci Resolve or Final Cut. Re-running the installer with the host closed usually resolves this.
- Render preview looks different from final output. Flicker Free analyses frames during processing, so a short preview might not capture the full flicker cycle. Render at least a few seconds of footage — long enough to cover several flicker repetitions — before deciding on settings.
- Plugin crashes or freezes on export. This often happens with very long time-lapse sequences or high-frame-rate clips. Break the footage into shorter segments, apply the plugin to each one, and export separately. It keeps the memory load manageable.
Remove LED flicker from an interview clip step by step
Here is a practical run-through for a common scenario — you shot an interview under LED panels and the footage has a visible rolling flicker.
- Bring your clip into the timeline in your host application. Place Flicker Free on the clip as an effect or filter.
- Pick a preset that matches your lighting situation. The LED preset is a good starting point for this case. Apply it and do a short test render — about two seconds of the clip.
- Watch the test render. If the flicker is reduced but still visible, increase the detection threshold in small steps until the pulsing disappears. If the subject’s skin looks waxy or trails behind movement, reduce the temporal smoothing slightly.
- Render another short test to confirm the new settings. Repeat step 3 until the flicker is gone and motion looks natural.
- Apply the same settings to the rest of the clip or copy the effect to other clips shot under the same lights. Render the full project as usual.
- Check the final export for any remaining flicker in longer sections. If a different part of the clip behaves differently, split it and adjust the parameters per segment.
Better than RE:Vision Effects for flicker removal
There are a few other deflicker options for Mac editors. Here is how Flicker Free stacks up against them.
- RE:Vision Effects ReelSmart Motion Blur. This plugin is primarily for motion blur, not flicker. It can smooth out some temporal artefacts as a side effect, but it is not built for the specific pattern of electrical or LED flicker. Flicker Free’s dedicated detection and presets give you more direct control over the problem. ReelSmart is better when your goal is motion blur, not flicker removal.
- Boris FX Continuum Flicker Fixer. Part of the larger Continuum suite, this tool handles basic flicker well and offers a similar preset system. The main difference is workflow: Continuum’s flicker fixer is one module in a big collection, while Flicker Free is a single-purpose plugin that stays focused. If you already own Continuum, you might not need another plugin. If you only need deflicker, Flicker Free is lighter and simpler to set up.
- DaVinci Resolve’s built-in deflicker. The built-in tool in Resolve works for mild flicker in simple clips, but it struggles with complex patterns like rolling flicker from LEDs or computer monitors. Flicker Free handles those cases more reliably, and it works across multiple hosts, not just Resolve. The built-in tool is free, but for difficult footage, the plugin saves a lot of manual keyframing.
- macOS (version not specified)
- 64-bit Intel or Apple Silicon processor
- Compatible host application (Final Cut Pro, After Effects, Premiere Pro, Avid, DaVinci Resolve, OpenFX host)
- Interface language: English
Kit check at a glance
| Chip | Apple Silicon, Intel 64-bit |
| Download | 24 MB |








Chat from the booth
Sign in or grab a free account to leave a comment.
Nobody has said a word in the booth yet. If you played a set with this build, tell the next person how it went.