
- Build in the crate
- 1.768
- Made by the team at
- xferrecords
- Menu languages offered
- English
- How you pay for it
- Included
- macOS it plays on
- OS X 10.11 or later
- CPU it runs on
- Apple Silicon, Intel 64-bit
Screenshots
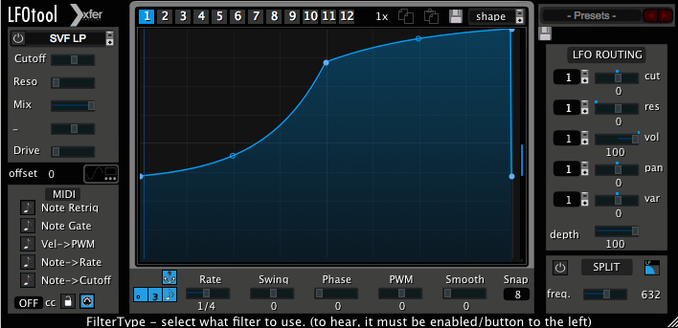
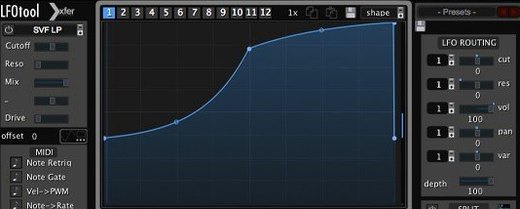
Electronic producers and sound designers who want movement in their mix reach for LFOTool. It's an audio effect that shapes LFOs and can also spit out MIDI messages, so you can drive other instruments with the same curves. The controls are where it shines.
- Point-and-curve editor: draw your own LFO shapes instead of picking from static waveforms.
- Up to four graphs can run at once, each assigned to Cutoff, Reso, or Pan for layered modulation.
- BPM-based rate control with optional swing, or switch to hertz for free-running LFOs.
- Sample-accurate sync keeps the modulation locked to your project's grid.
- MIDI message stream output lets you control external synths or plugins with the same LFO.
- Dozens of presets cover AutoPan, Tremolo, sidechain pumping, and autofilter effects right out of the box.
It works as VST, AudioUnit, or AAX, so it slots into most Mac hosts. If you want rhythmic movement that feels musical rather than mechanical, LFOTool gives you the tools to dial it in.
First days with LFOTool
Once LFOTool is installed and activated, spend an afternoon with the presets. Open a simple synth pad or a drum loop and cycle through the factory list. Each preset shows you what the plugin can do — AutoPan, sidechain-style pumping, filter wobbles. Listen to how the LFO shapes affect the feel. Some presets use a single graph; others layer two or three at once. You will hear the difference immediately.
After you find a few presets you like, open the curve editor. Click on a point and drag. Add a second point and pull the tension handle. The curve changes in real time. Try a sharp sawtooth for aggressive pumping, then a slow sine for gentle movement. The point-and-tension editor is where LFOTool stops being a preset box and becomes your own modulation tool.
Map one graph to Cutoff, another to Pan. Listen to how they interact. A slow pan with a fast filter sweep creates a rhythm that feels alive. Save your own preset when you get something you like. The plugin remembers up to twelve graphs per preset, so you can build complex movements over time.
Works inside Logic, Ableton, or any DAW
LFOTool works inside your existing host — Logic Pro, Ableton Live, Cubase, or any DAW that loads VST, AudioUnit, or AAX plugins. It does not need a separate window or external app. Load it on an audio track, a bus, or a group channel. The MIDI message stream is the feature that connects it to other instruments. Route the MIDI output to a software synth or a hardware unit that accepts MIDI CC. The same LFO curve that wobbles your filter can also modulate a synth's pitch or a reverb's decay.
On macOS, LFOTool runs natively on both Intel and Apple Silicon Macs. No Rosetta translation needed if your host is native. The plugin is lightweight — written in C++ to keep CPU usage low. You can run several instances on a single track without bogging down the system.
Because it supports sample-accurate sync, LFOTool locks to your DAW's transport. Start and stop the project, and the LFO resets to the correct phase. This matters when you bounce or freeze tracks: no drift, no guessing where the modulation starts.
Switch between BPM and hertz with one click
LFOTool lets you switch between BPM-based rate and hertz with a click. BPM mode is for tempo-synced projects. Hertz mode is useful for sound design or when you want a free-running LFO that does not follow the grid. Try hertz on a long ambient pad for slow, drifting movement.
The swing control is subtle but useful. Add a small amount of swing to the LFO rate, and the modulation shifts off the straight grid. It gives a human feel to rhythmic effects like tremolo or autofilter. Not all LFO plugins offer this.
You can assign up to four graphs to run simultaneously. Each graph can target a different parameter. Cutoff on graph one, Resonance on graph two, Pan on graph three. The fourth graph could send MIDI CC to an external synth. This layering is what makes LFOTool flexible for complex patches.
MIDI note switching is another detail. A preset can store twelve graphs, and you can switch between them using MIDI notes or automation. This turns LFOTool into a performance tool. Change the modulation pattern mid-scene without touching the mouse.
Start with a bass loop and the default tremolo preset
You open your DAW and load a bass loop on an audio track. You add LFOTool as an insert effect. The default preset is a simple sine wave LFO mapped to volume. It sounds like a basic tremolo. Not bad, but you want something more interesting.
You browse the preset list and pick one called "Sidechain Pump." The bass now ducks in a rhythmic pattern that mimics a sidechain compressor. It works, but the feel is a bit straight. You open the curve editor and grab the tension handle on the rising edge. You pull it into a sharper curve. The pump becomes snappier, more aggressive. You add a second graph and map it to Pan. You set the rate to half of the first graph. The bass now moves left and right slowly while it pumps in time with the kick.
You decide to send the LFO to a synth pad on another track. You route the MIDI output of LFOTool to the synth. The same curve that modulates the bass now controls the filter cutoff on the pad. The two tracks move together without any extra programming.
You save the whole setup as a preset inside LFOTool. Next session, you load it and the curves are exactly as you left them. Twelve graphs are available if you need them later. For now, two are enough.
- macOS 10.11 or later
- Intel or Apple Silicon
- VST or AudioUnit-compatible host
Kit check at a glance
| System | OS X 10.11 or later |
| Chip | Apple Silicon, Intel 64-bit |
| Download | 7 MB |





Chat from the booth
Sign in or grab a free account to leave a comment.
Nobody has said a word in the booth yet. If you played a set with this build, tell the next person how it went.