

- Build in the crate
- 16.8.6.25
- Made by the team at
- Phase One
- Menu languages offered
- Russian, English, German, Spanish, Italian, Chinese (Simplified), Korean, Portuguese, Ukrainian, French, Japanese
- How you pay for it
- K'ed by TNT team
- macOS it plays on
- macOS 12 or later
- CPU it runs on
- Apple Silicon, Intel 64-bit
Screenshots
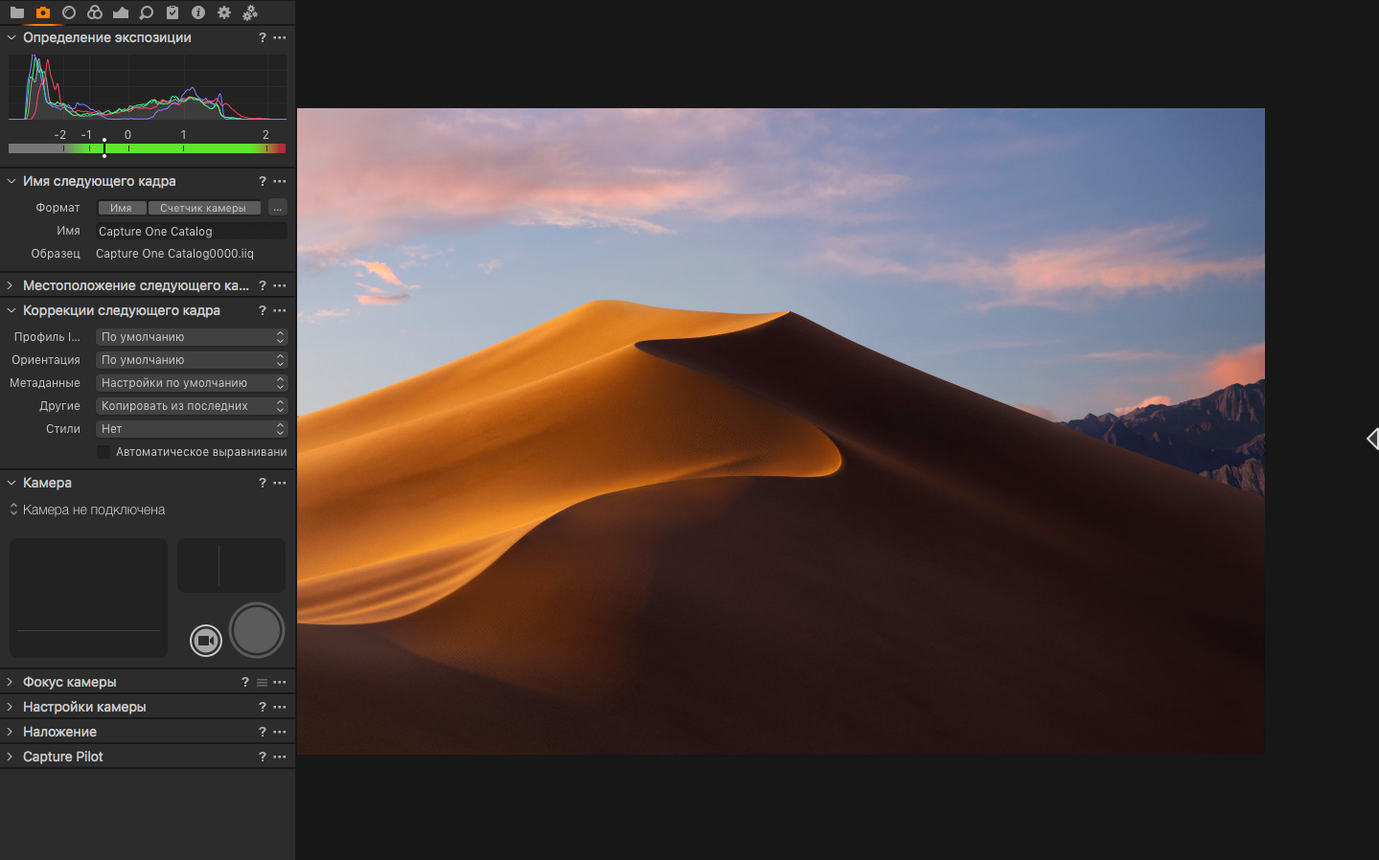
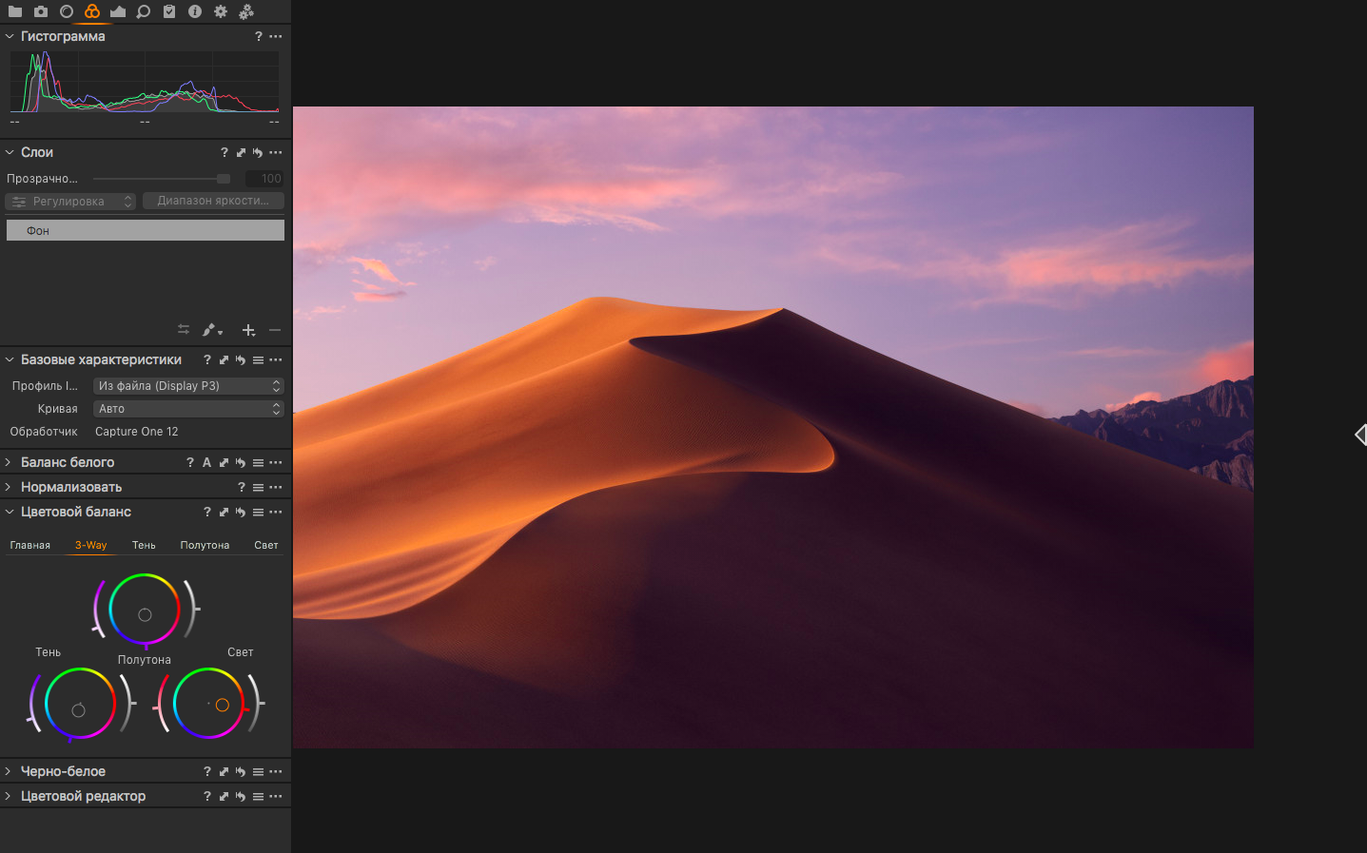
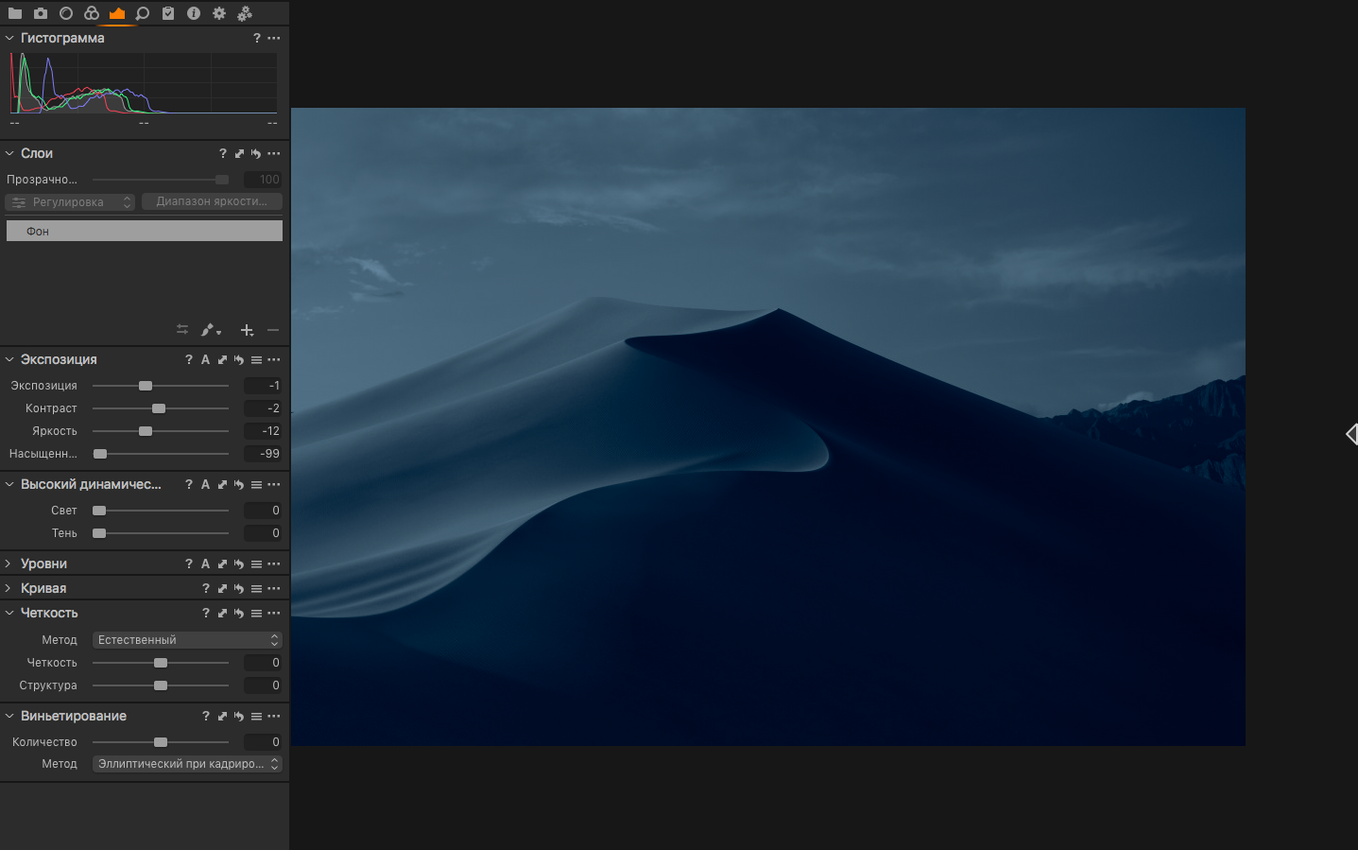
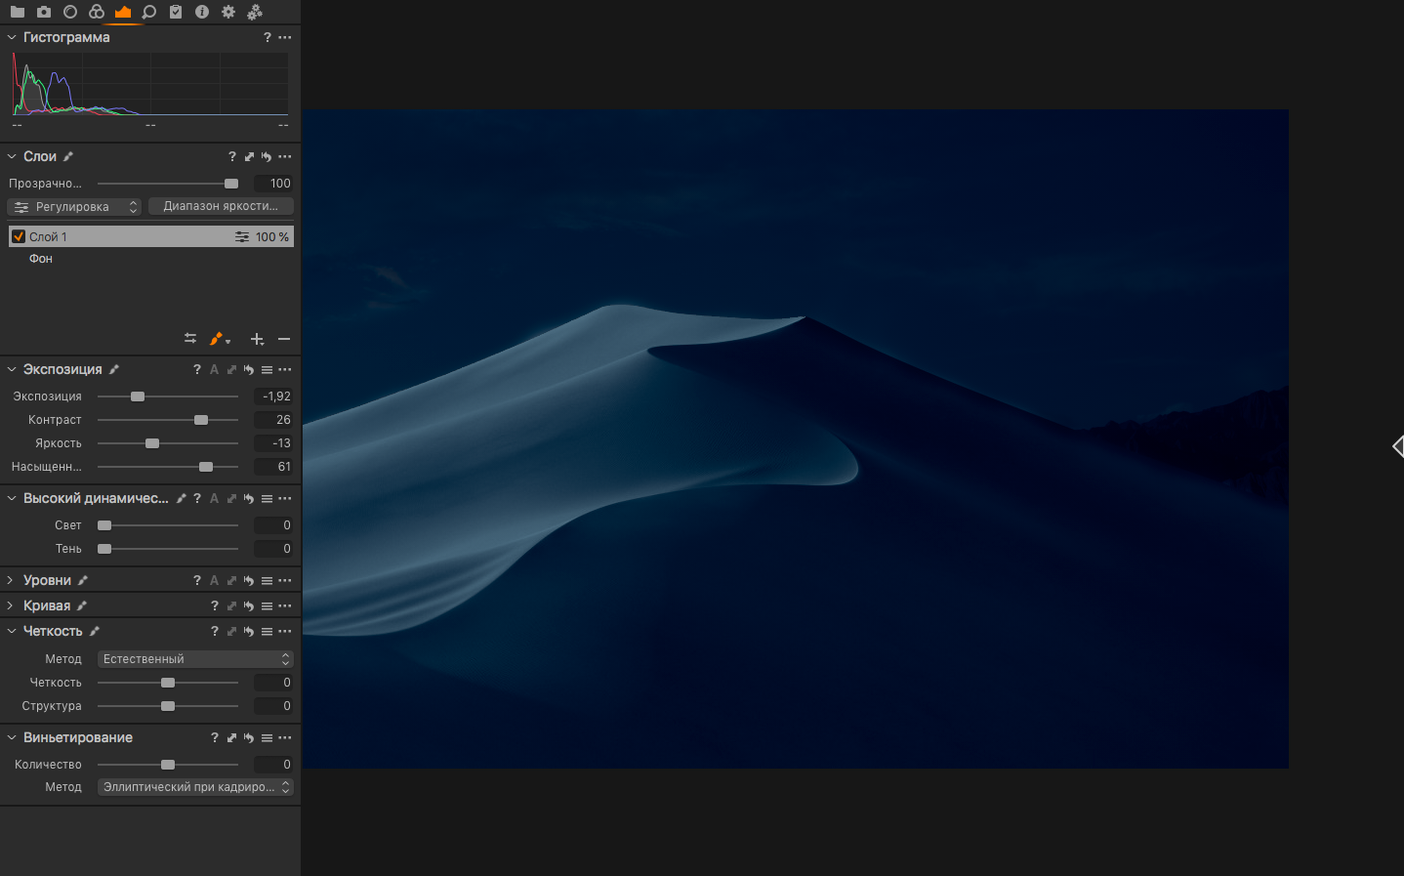
White balance eyedropper first. Click a neutral gray point in the frame and the whole mood shifts in one move. That's Capture One doing what it does best: giving you direct control over color instead of fighting you for it.
RAW processing is the core job here. Each correction variant starts from the original file, so you can try a warm grade, a cool grade, and a punchy contrast look without ever degrading the source. Sharpness, temperature, tint, all adjustable. When you need to move fast, convert on the fly in single-image or batch mode.
Tethering is where Capture One earns its keep. The 16.8 release improved wireless tethering and added assisted review, which helps you spot issues while the subject is still in front of the lens. New contact sheets make culling sessions more like a printed light table.
Enhanced denoise landed in 16.8 too, useful for high-ISO work. The app runs natively on Apple Silicon and Intel Macs, so it fits most setups. If your workflow is about color, detail, and capture-to-export control, this is the tool that speaks that language.
variants that don't duplicate the RAW file
Capture One has a few quiet features that don't make headlines but save time every session. One is the way it handles multiple correction variants. Instead of duplicating the whole RAW file, each variant is just a set of instructions applied to the original. You can flip between a neutral edit and a creative look with one click, and the disk stays uncluttered.
The eyedropper for white balance deserves a second mention because it works across variants too. Set a neutral point in one variant, switch to another, and the reading stays available. That means you can match white balance between two looks without re-picking the same gray card.
Batch conversion has a small but useful detail: you can queue files and keep working. It doesn't lock you out of the interface while the engine churns through a hundred RAWs. That matters when you're on a deadline and need to edit while exporting.
Another convenience is the language support. With eleven languages available, including Korean, Ukrainian, and Simplified Chinese, the interface fits teams where not everyone works in English. No separate language packs to download; it's all in the same build.
bump or lower the default preview size
If you're opening Capture One for the first time, a few adjustments make the initial sessions smoother. The default preview size is set to a moderate resolution. Bump it up if you're pixel-peeping sharpness or down if you're culling thousands of frames on a laptop. The setting lives in the preferences, and changing it affects how fast thumbnails load.
The auto-rotate option is another one to check. Some cameras embed orientation data that Capture One respects by default, but if you shoot in portrait and prefer to keep the image as-shot, turn it off. Otherwise, every vertical frame gets flipped automatically, which can throw off your initial scroll through a contact sheet.
Keyboard shortcuts are worth customising early. The app ships with a sensible set, but if you come from another RAW editor, muscle memory might fight you. Reassign the most-used tools — white balance eyedropper, crop, spot removal — to keys you already reach for. It takes five minutes and saves hours over a year.
For tethered shooting, check the auto-advance setting. After each capture, the view can either jump to the new image or stay on the last one you were editing. Studio shooters usually prefer the automatic jump; product photographers often want to stay put. Pick what fits your rhythm.
tethered shooting and color-accurate RAW
Capture One is built for people who shoot RAW and care about color accuracy. That includes studio photographers tethering to a MacBook or iMac, food and product photographers who need consistent whites, and portrait shooters who grade skin tones across a whole session.
It also suits anyone working with medium-format backs, especially Phase One gear. The integration there is tighter than any other RAW converter, but even with a Canon, Nikon, Sony, or Fujifilm body, the tethered experience is reliable.
Teams in a shared studio benefit from the language options and the variant system. One shooter can grade on a Mac in English while the retoucher reviews variants in French on another machine. The RAW file stays untouched, so there's no accidental overwrite.
Mac users running Apple Silicon will notice that the app feels responsive during batch exports and heavy denoise work. The Intel build works fine too, but if you've upgraded to an M-series Mac, the native version uses the hardware efficiently. No emulation layer needed.
using global sliders instead of layers and masks
The most common slip is treating Capture One like Lightroom. The toolset is similar, but the logic underneath is different. Beginners often reach for global sliders when they should use layers and masks. Capture One's layer system is powerful, but it takes a few sessions to click. Spend an hour with the manual or a tutorial before you start editing.
Another mistake is ignoring the variant system. New users sometimes export a TIFF, edit that, and then wonder why they can't go back to the RAW settings. The correct workflow is to create a new variant from the original RAW, apply changes there, and keep the source untouched. That way you can always reset or branch.
White balance mistakes happen too. The eyedropper works best on a truly neutral gray point, not a white wall that might have a color cast. Beginners click on highlights and get a skewed reading. Use a gray card or a known neutral area for reliable results.
Beginners also overlook the tethering settings. They plug in the camera, see nothing, and assume the software is broken. The fix is usually simple: check the camera profile, make sure the correct folder is selected, and confirm that the camera is set to PC remote mode. Capture One supports over 500 camera models, but each brand has its own tethering quirks.
Finally, some users skip the export panel and save files from the wrong menu. Capture One can export to full-size TIFF in RGB or CMYK and to JPG, but the options are in the export dialogue, not the save command. Learn that panel early, and you'll avoid flattened files or wrong color spaces.
- Enhanced denoise added in 16.8.
- Assisted review added in 16.8.
- New contact sheets added in 16.8.
- Support for Canon EOS R6 V, Phase One IXM-RS250, and Panasonic DC-L10.
- macOS 12 or later
- Apple Silicon or Intel 64-bit
Kit check at a glance
| System | macOS 12 or later |
| Chip | Apple Silicon, Intel 64-bit |
| Download | 1.2 GB |
| Older pressings | 4 in the crate |


Chat from the booth
Sign in or grab a free account to leave a comment.
Nobody has said a word in the booth yet. If you played a set with this build, tell the next person how it went.