

- Build in the crate
- 9.3.0
- Made by the team at
- ByteDance
- Menu languages offered
- Russian, English, German, Hungarian, Vietnamese, Greek, Indonesian, Spanish, Italian, Chinese (Traditional), Chinese (Simplified), Korean, Malay, Dutch, Polish, Portuguese, Romanian, Thai, Turkish, Filipino, Finnish, French, Czech, Swedish, Japanese
- How you pay for it
- K'ed by caastle.cracker
- macOS it plays on
- macOS 10.14 or later
- CPU it runs on
- Apple Silicon, Intel 64-bit
Screenshots
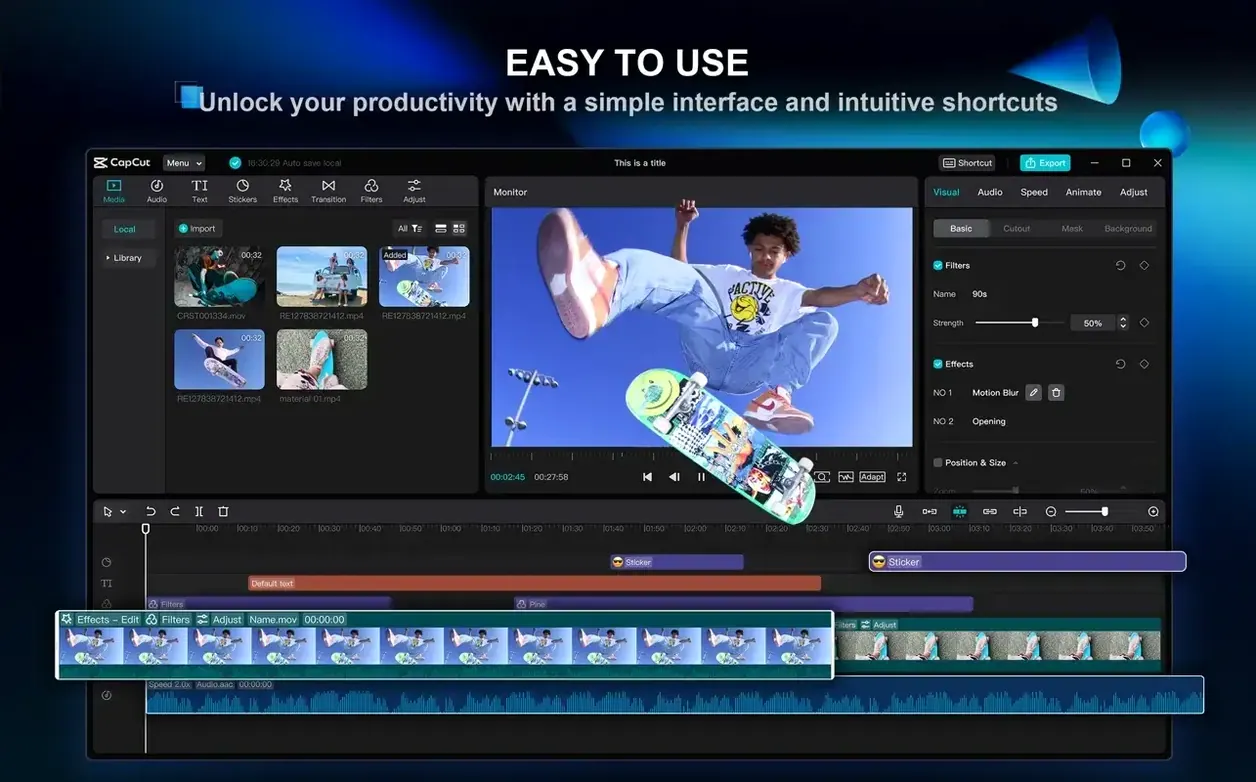
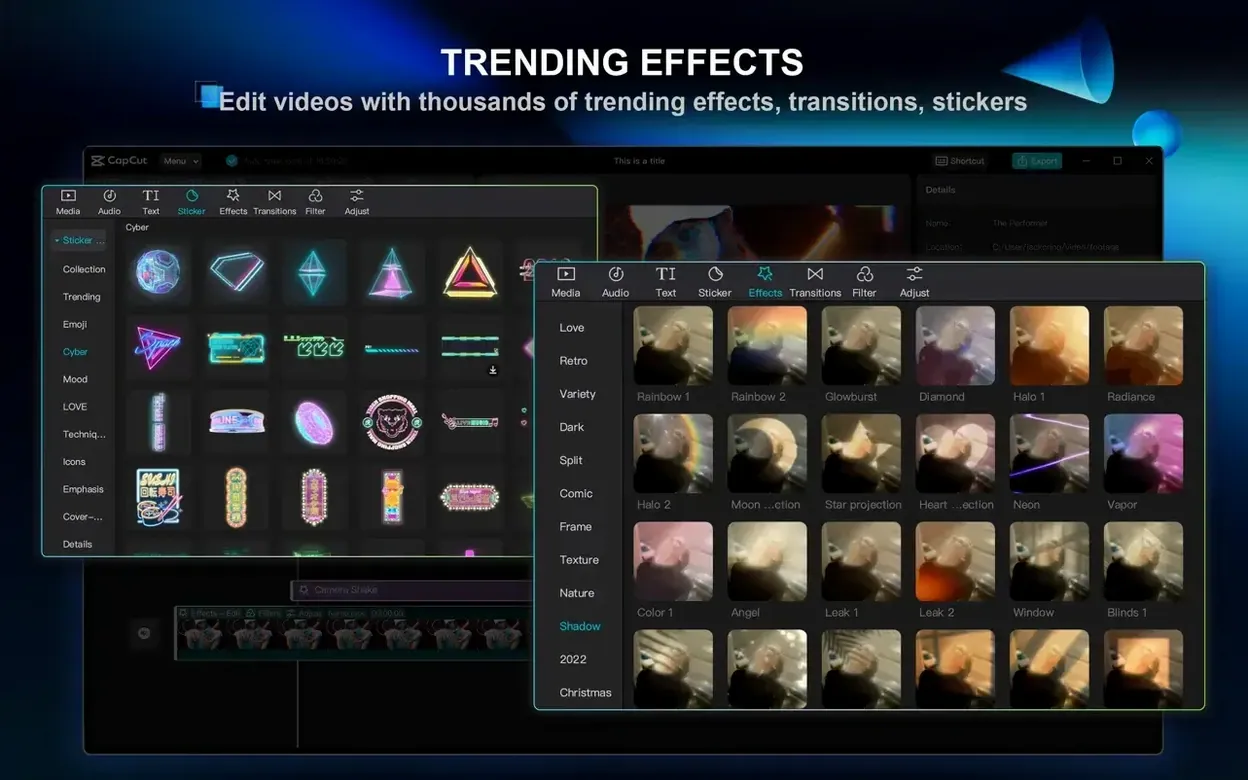
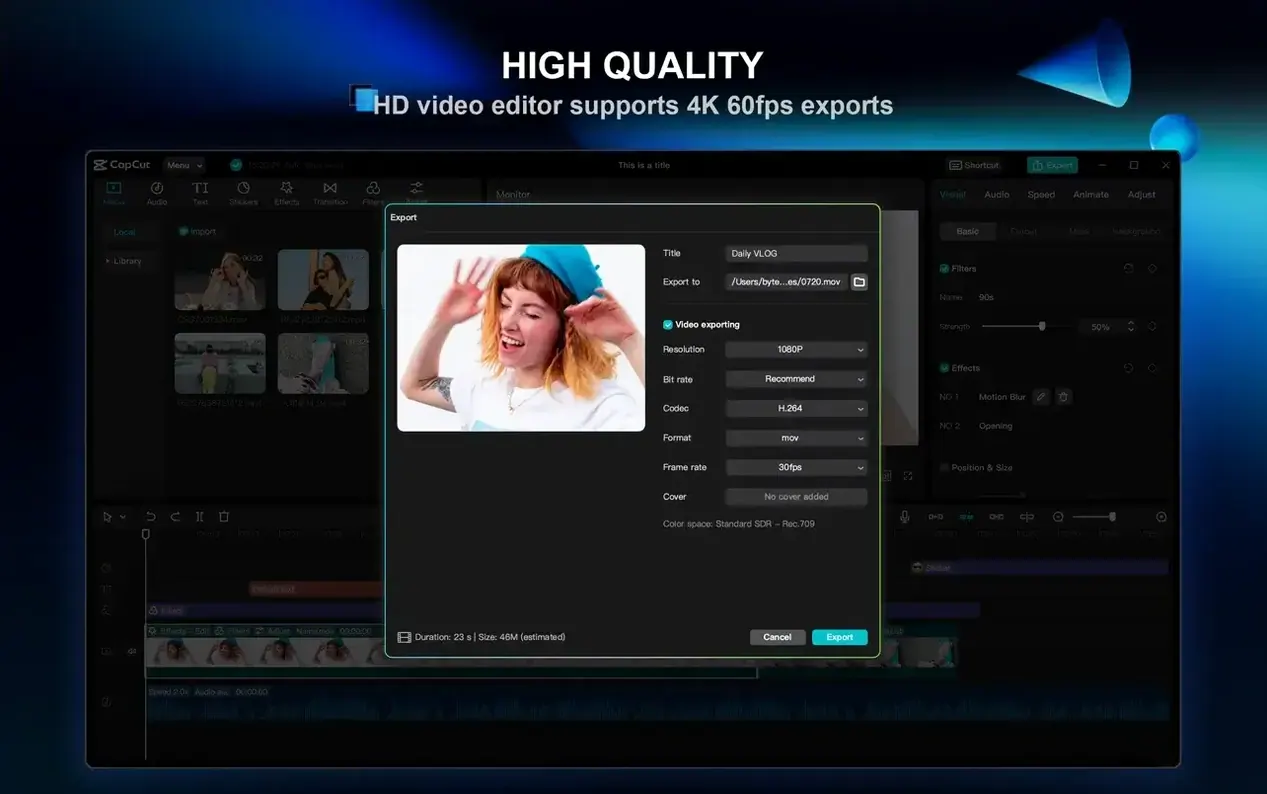
The current version of CapCut for Mac, 9.3.0, keeps the same set of AI-assisted tools that made it popular: it can remove filler words from a podcast in one click, turn a script into a video, and convert text to speech with multiple voices. If you’re considering a capcut ultra download for your Mac, here’s a quick run-through of how it fits into a typical editing session and what to expect.
Trim, split, and chroma key
Import your footage, trim or split clips on the timeline, and arrange them. The basics — cut, join, split — are all there. When you need to remove a background, the chroma key tool handles it by colour.
Add motion and polish
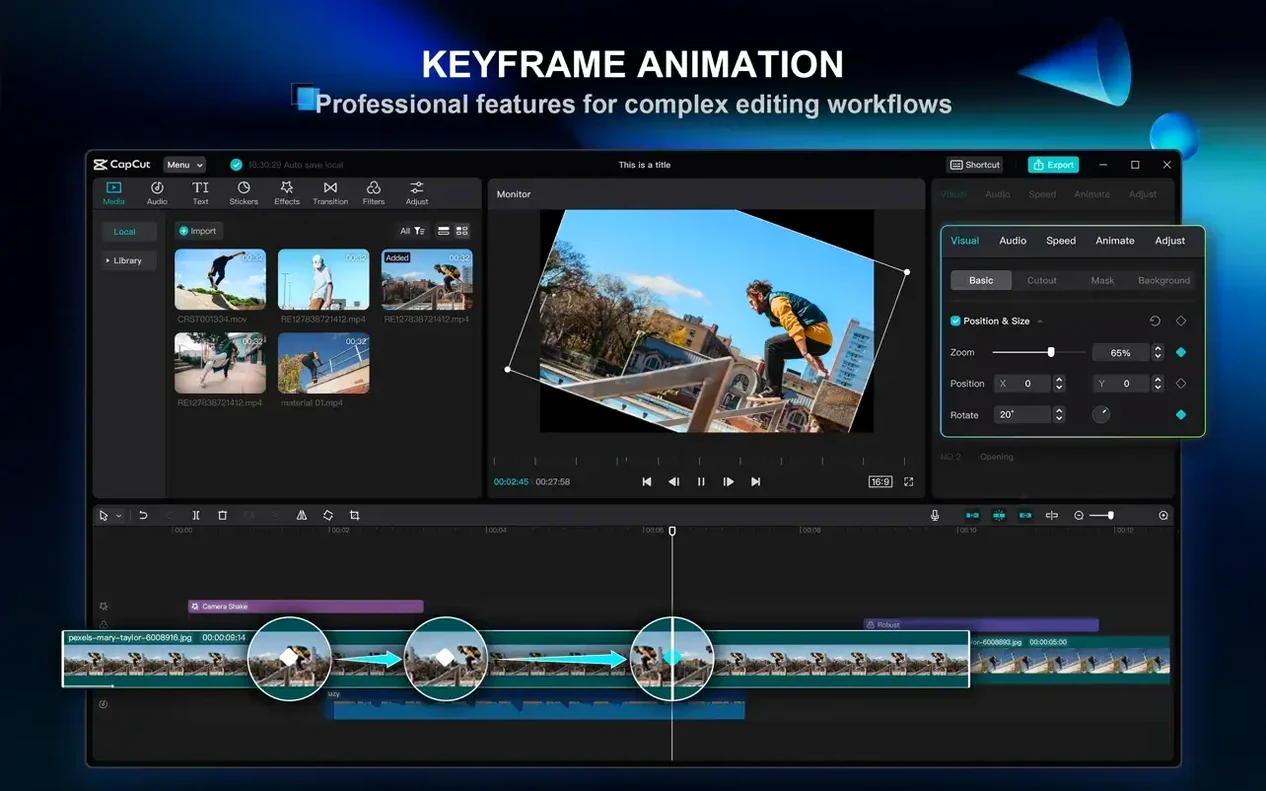
Keyframe animation lets you create custom movements or fades. For a more polished voiceover, the AI tool strips out ums and pauses automatically.
Finish with text or voice
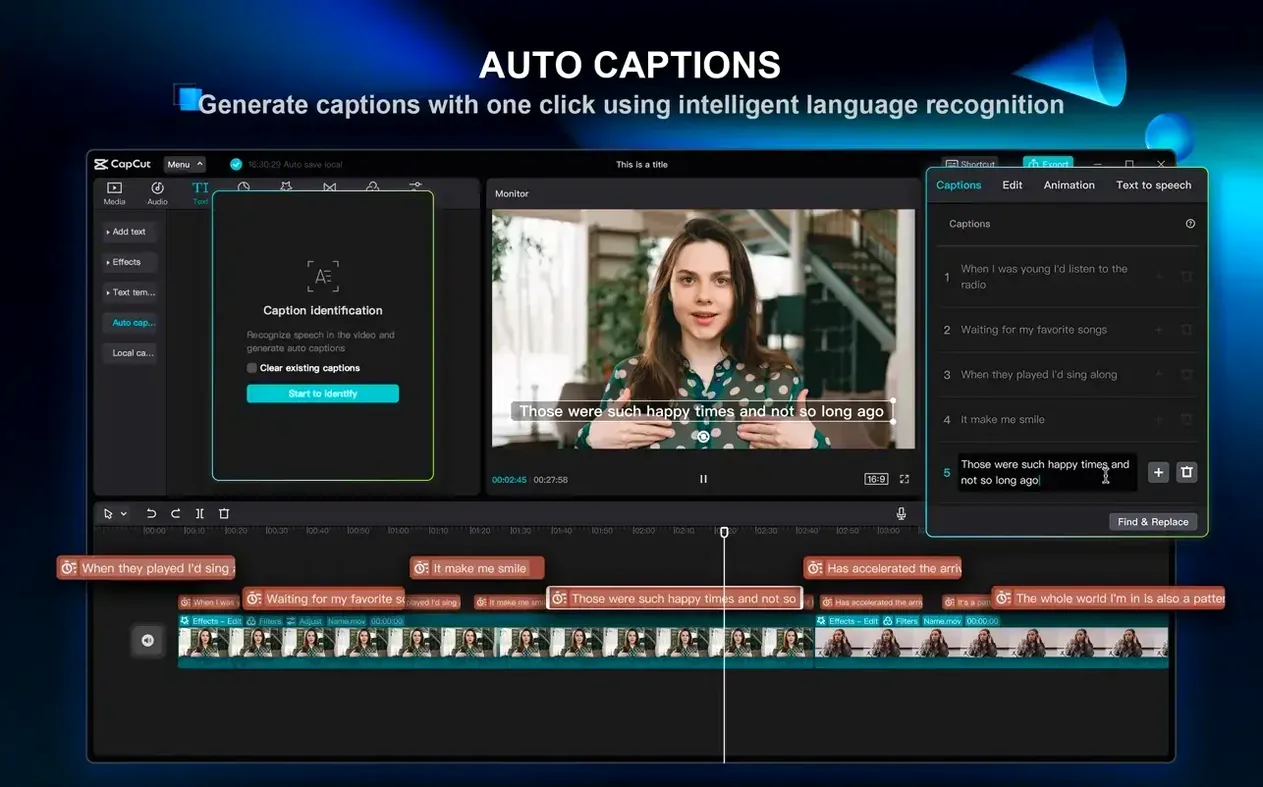
Generate narration from a script using text-to-speech, or bake titles and captions straight into the timeline.
CapCut runs on macOS 10.14 or later and supports both Apple Silicon and Intel Macs. Its interface is available in over twenty languages, so you can work in whichever one suits you.
Quick AI tools for social media editors
CapCut covers a wide range of users, but a few groups really click with it. Social media editors who need quick turnaround — think TikTok, Instagram Reels, YouTube Shorts — benefit from the AI tools that speed up repetitive tasks. Removing background with one click or generating subtitles from speech saves minutes per clip, and over a week that adds up to real time saved.
Podcasters and content creators who record long takes also get a lot out of it. The filler word remover is a standout here: instead of scrubbing through a thirty-minute recording to cut out every "um" and "uh", you let the tool do it in one pass. For interview-style videos, the automatic subtitle generation means you can publish with captions without manually syncing text to audio.
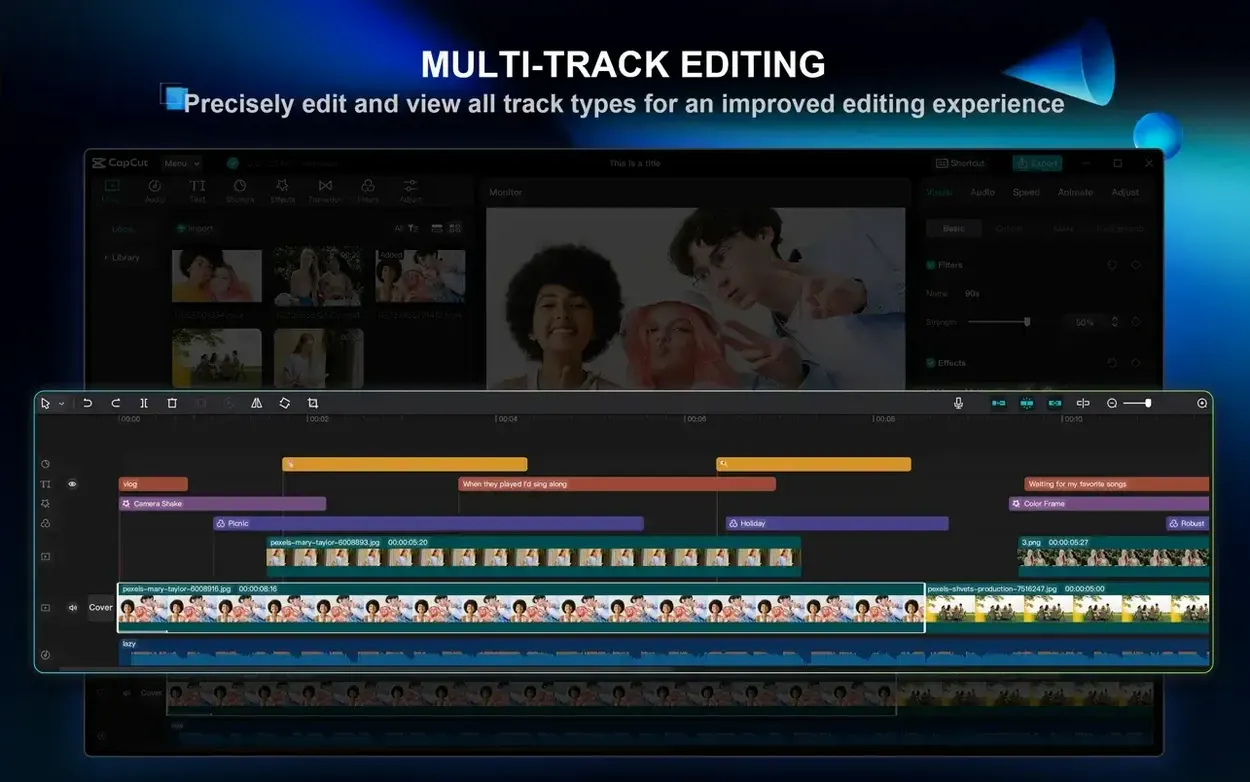
Beginners who find professional NLEs intimidating appreciate the clean layout. You don't need to learn complex colour grading panels or audio routing to get a decent result. Advanced editors can still use multi-track editing and keyframe animation for more control, but the learning curve stays shallow.
If you work on a Mac with limited storage, the modest system requirements help. CapCut asks for 2 GB of free disk space for installation and runs fine on 4 GB of RAM, so older Intel Macs or base-model MacBook Airs can handle it without choking.
Internet needed for AI tools, not basic edits
Does CapCut work on older Macs?
Yes, as long as you're on macOS 10.14 or later. That covers Mojave, Catalina, Big Sur, Monterey, Ventura, Sonoma, and Sequoia. Both Intel and Apple Silicon Macs are supported, so whether you have a 2015 MacBook Pro or an M3 MacBook Air, it should run.
Can I export in 4K?
CapCut exports video up to 4K at 60 frames per second. If your source footage is higher resolution, you can still export at 4K or drop to 1080p for smaller file sizes.
Text-to-speech and script-to-video require connection
Some AI tools, like text-to-speech and script-to-video, process data on ByteDance's servers, so they need a connection. Basic editing — cutting, trimming, transitions, keyframes — works offline. You can edit on a plane or a train and export later when you reconnect.
Switch among 20+ languages in settings
There are over twenty languages to choose from, including English, Spanish, French, German, Italian, Russian, Japanese, Korean, and Chinese. You can switch languages in the app settings without reinstalling.
Can I use CapCut alongside other video tools?
Yes. CapCut imports common video formats, so you can move files between it and other editors. Some people cut rough versions in CapCut for speed, then export a ProRes or H.264 master to finish in a more advanced NLE. Others use it as a standalone tool from start to finish.
A workflow: clean up a talking-head video with captions
Here's one way to use CapCut for a typical job — recording a short tutorial or vlog, removing the awkward pauses, and adding readable captions.
- Import and trim. Drag your video file onto the timeline. Use the split tool to cut out any mistakes or long silences at the start and end. Keep the main take intact.
- Remove filler words. Select the audio track on the timeline. Open the audio tools and look for the option to remove filler words or pauses. CapCut scans the speech and cuts out "um", "uh", and long silences. Review the result and make manual adjustments if needed.
- Generate subtitles. With the cleaned audio, go to the text tools and choose auto captions. The app transcribes the speech and places subtitles on the timeline. You can edit the text, change the font, or adjust the timing if a word is off.
- Add a simple intro. Import or create a short title clip. Use a transition from the built-in library to blend it with the main video. Keep it simple — a fade or a wipe.
- For higher quality, go up to 4K at 60 fps. The export finishes quickly enough that you can review and re-upload if needed.
This whole process takes less time than manually cutting silences and typing captions in a traditional editor. For a weekly series, it makes a real difference.
How CapCut fits with other apps and macOS features
CapCut works like a standard macOS app. You install it by dragging the app from a disk image to the Applications folder, and it appears in Launchpad like any other program. It uses the system file picker for imports and exports, so you can browse iCloud Drive or external drives without leaving the app.
If you use other creative tools, CapCut slots in easily. Export your video as an H.264 or MOV file and bring it into Final Cut Pro, DaVinci Resolve, or Adobe Premiere for further grading or audio mixing. For quick projects, you can stay entirely inside CapCut and skip the export round-trip.
The app also plays well with macOS screen recording. Record a tutorial or a demo with QuickTime Player or the built-in screenshot toolbar, then drop the recording straight into CapCut for trimming and captions. No format conversion needed.
For audio, you can pull in music files from your iTunes or Music library, or use the built-in soundtracks and effects. If you prefer to edit audio separately in Logic Pro or GarageBand, export your final mix as a WAV or AIFF file and import it into CapCut's multi-track timeline alongside your video.
Overall, CapCut fits into a Mac workflow without forcing you to change your habits. It handles the heavy lifting on repetitive tasks and leaves you free to focus on the creative decisions.
- macOS 10.14 or later
- Apple Silicon or Intel 64-bit processor
Kit check at a glance
| System | macOS 10.14 or later |
| Chip | Apple Silicon, Intel 64-bit |
| Download | 1.1 GB |






Chat from the booth
Sign in or grab a free account to leave a comment.
Nobody has said a word in the booth yet. If you played a set with this build, tell the next person how it went.